Making a Stand
The decision was made – I needed new stands. There was
nothing intrinsically wrong with the AiM resin stands but they were too large
for my purposes. I wanted to play out the scenarios in the CY6 campaign books
but they all indicated really large tables. They seemed might they might better
fit 1/300 scale models, but I was pretty happy with the 1/200 models from AiM
and had even bought the odd WoW piece on eBay. What size to make the stands
though?
AiM models were fine on the aerials, but there was no gimbal
with which to indicate the attitude and pitch of the plane. Given that was a
visual aspect of Canvas Eagles that I quite enjoyed it was something that I wanted
to add to our games. The second consideration was that the three inch stands
were too big for single engine aircraft at 1/200 scale.
The BRS aircraft that Santa handed out at Christmas time have
of course their own stands. Those come in at 1.5 inches and were a good fit for
the model size. Playing around with some hex sheets that I printed out on A4 and
playing with numbers to determine the approximate area available on a 6x4 or
8x4 foot table came next. It was pretty clear that I needed to have smaller
stands so that it was easier to play out scenarios on a just a couple of
standard boards.
Model sizes were a limit to how small a stand I could use. Two engine bomber models measured about 10x10cm size, so 1-1.5 inch stands really
too small. BRS had compensated for that with the larger stand into which their
regular one is inserted, which is a natty idea. Those larger bases were 2 and a
bit x 3 inches, which was greater than the average that I wanted. Something
that was in-between the two BRS base sizes was something that I thought of
aiming for.
I considered for a while the idea of using BRS stands for
all models. The drawbacks there were that while I could put a Litko dial on
them to indicate altitude bands I couldn’t stack them up to visually represent
those changes. I’d also need to create a connector for the top of the stand
with a magnet on it so the AiM models could be easily attached. I figured if I
could replicate the rod-top connector for the BRS bombers that could do the
job, but it would all be pretty top-heavy considering the weight and diameter
of the stand and the weight of the gimbal. I still really wanted a gimbal of
some sort!
At that point I vaguely remembered seeing a gimbal magnet
somewhere on the web, and after a bit of searching across various sites and
found the GSW magnets on offer. Gimbal problem was solved.
I went back to working out how to have that visual
representation of altitude differences. Attaching a metal aerial to a stand
that was less than 3 inches seemed to leave a construct that was at too great a
risk of toppling over unless I had a fairly decent gauge of steel sheet
attached to it. That option seemed it would be expensive to make, especially
considering the need for so many cuts and the need to make them precisely
enough to fit under the Litko bases.
I’d seen the BwanaJoe page that used a gimbal attached to
one of the Wings of War pegs. The concept was good, but those little pegs
seemed a little vertically anaemic, so I’d need something a little more
impressive. Acrylic rods are available from Litko, so I decided to try using
magnets to connect them but with larger rods that would represent multiple altitude
levels. We’d tried that at the club with the aerials, using one graduation to
represent two altitude levels and it seemed to work fine. So back to the Litko
site and I ordered some 40mm rods, some 15mm rods, and 2 inch wide 3mm acrylichexagonal stands. A local magnet store made 4x2mm rare earth disc with 434g
pull. Those magnets fit the rods nicely, and the also provided enough pull to
hold everything together quite firmly.
With the gimbals from GSW and the rods, bases and disc
magnets everything was set.
Only after I had a good look at the bases from Litko did I realise
that I hadn’t asked for them to be drilled, so did it myself with a 3/16” bit.
That was too tight a fit for the rods, so I tried a 5mm bit, but that was marginally
too large. In the end I used the 5mm bit to drill halfway through the bases so
that the rods sat within the base without going all the way through. I also drilled
into the top of some of the short rods to create a cavity into which the ball
bearings from the gimbals were glued.
I marked the discs (magnets) so that each rod had a top and
a bottom so that the gimbal portion would always sit on top of a rod or on the
base.
I had problems filing the acrylic rods square at the end, so
some of the combinations were a little wonky. It was only later that I worked
out that laying the rod flat on a piece of galvanised iron sheet and using a
rectangular file, rotating the rod regularly, produced the best outcome.
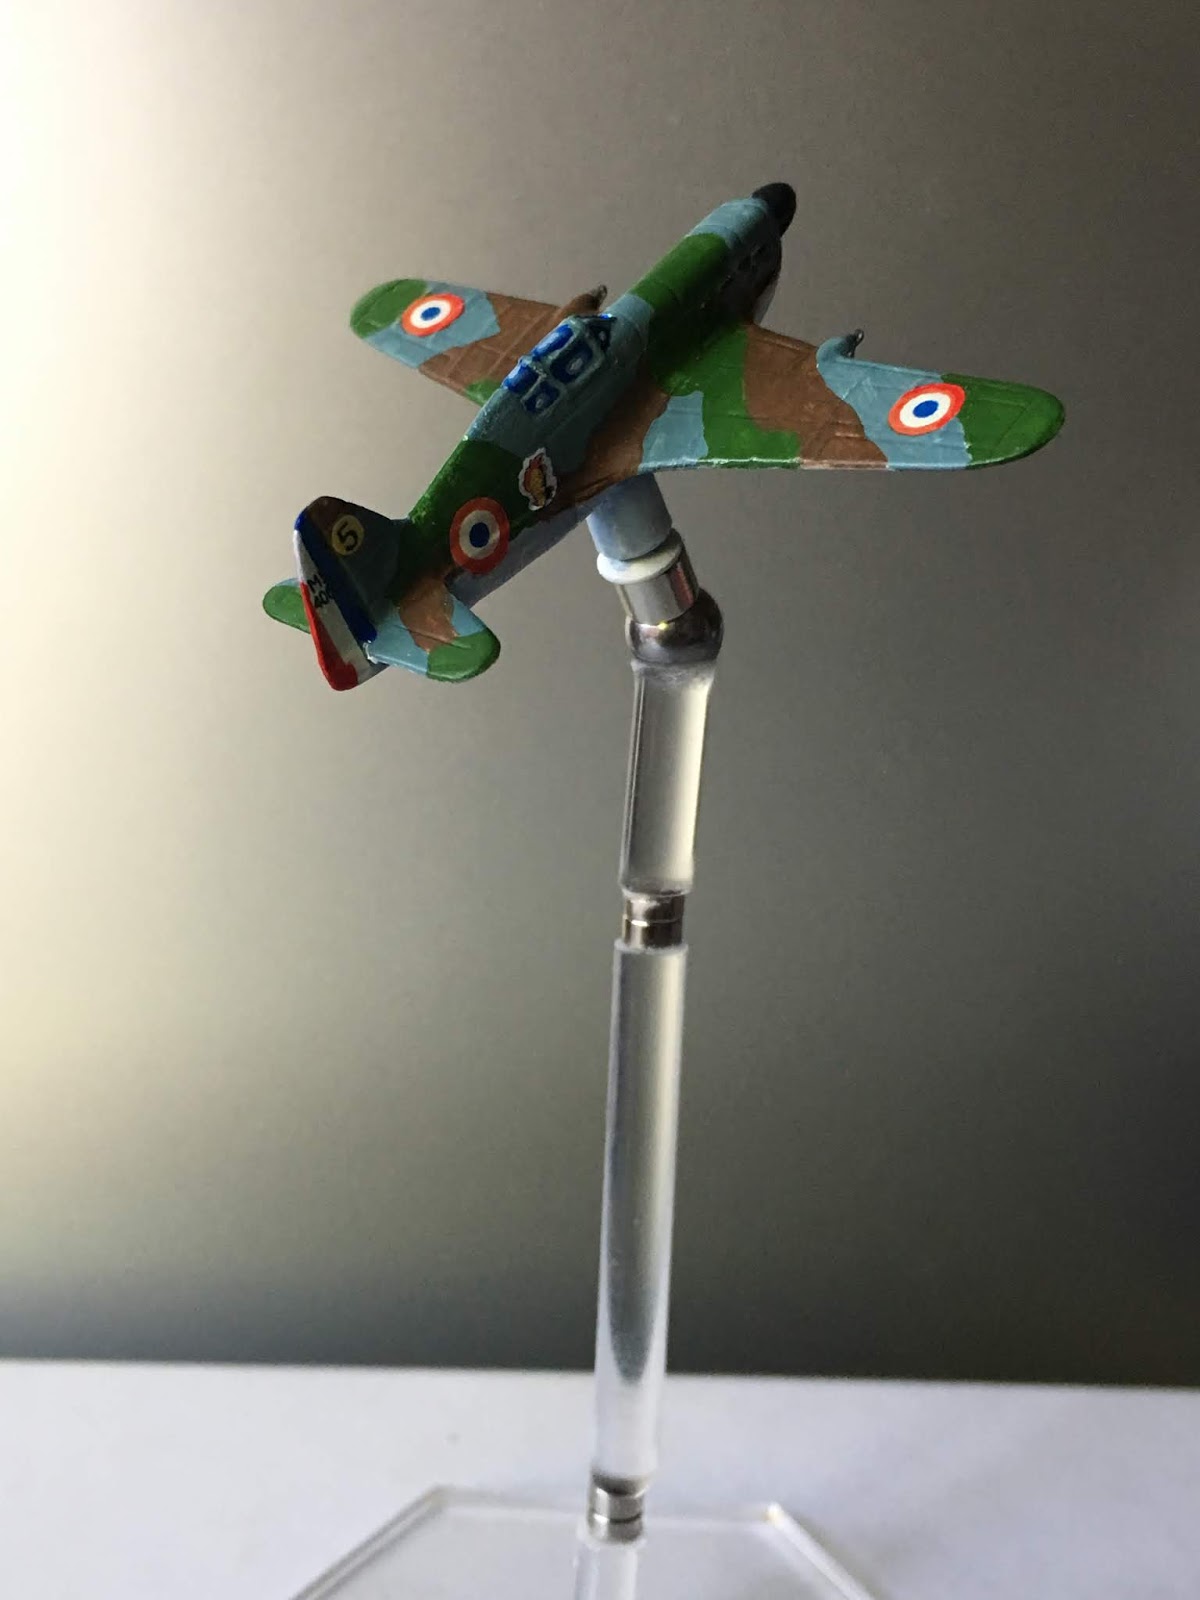
The end result is a base which holds the model well, doesn’t
have a centre of balance that’s too high, and combined with the dials on the
lowest rod can give a fair impression of altitude differences. The gimbals
worked brilliantly, which gives it was one of the features I was really after:
the ability to be able to see at a glance which aircraft was performing what
sort of manoeuvre and turn.
In between the stands I was working on some fighters and
bombers for the French l’Armée de l'Air, so have combined the two for the first
pictures of both.


 |
 |
 |
 |
 |
 |
POSTSCRIPT: Since putting them together I’ve shown them to
the proprietor of the House of War in Ringwood, Victoria. He’s interested in
working out a commercial production method, so eventually people who’d like to
purchase them made can do so. But for those of you who don’t want to wait you
could give this a go yourself for fairly reasonable outlays and without too
much effort.